Application Note B-XRD3001
Introduction
Shot peening is a surface treatment method mainly used to improve the durability and reliability of metal parts. Materials such as iron and ceramics are shot at the surface of metal parts at high speed to create compressive residual stress, which improves fatigue strength and durability against stress corrosion. Shot peening is applied, for example, to metal parts on aircraft and automobiles, pressure vessels in chemical plants, etc., which are used continuously for a long time. Residual stress measurement by X-ray diffraction is the most common method to evaluate the effect of the shot peening process. In this method, the sample surface is removed stepwise by electrolytic polishing, and X-rays are irradiated to measure the stress at each step. The relationship between depth from the sample surface and residual stress is thus evaluated. In electrolytic polishing, the surface of the sample is electrochemically polished, making it possible to uniformly remove the surface of the sample without applying physical forces.
Measurements and results
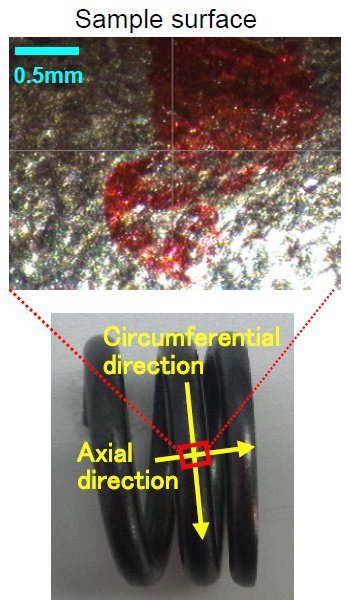
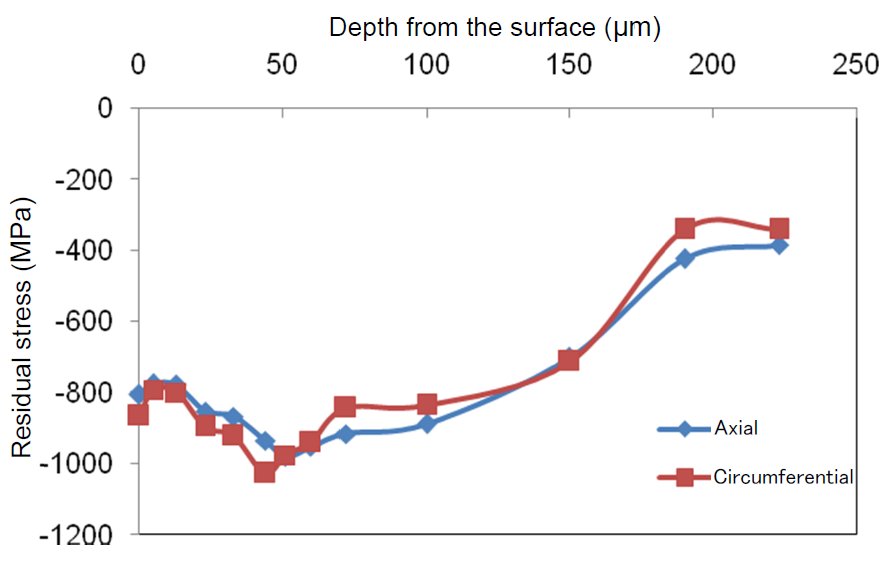
Residual stress of a coil spring was measured by the X-ray diffraction method while gradually removing the sample surface several tens of μm to 230 μm in depth by electrolytic polishing to evaluate the stress distribution in the depth direction. The measurement was conducted in two directions on the sample surface, the circumferential and the axial directions of the coil spring (Figure 1). Figure 2 shows the residual stress value corresponding to the depth from the sample surface.

Figure 1: Measurement directions on the sample

Figure 2: Stress distribution in the depth direction of a coil spring treated by shot peening
In both axial and circumferential directions, the compressive stress gradually increases from the sample surface to a depth of about 50 μm and gradually relaxes in the region deeper than 50 μm. The compression stress created on this coil spring is independent of direction. The maximum compressive residual stress is 1 GPa or more, which exists at a depth of about 50 μm from the sample surface.

