Application Note RACCT9027
About the sample: Aluminum
Aluminum is the most abundant metallic element in Earth’s crust and the second most used metal next to iron. Aluminum is usually alloyed to improve its mechanical properties. Owing to its low cost and lightweight, aluminum is used in many areas including automobiles, aircraft, packaging, building construction, and electronics. Aluminum parts can be produced by casting, machining, 3D printing (additive manufacturing), etc. However the parts are made, evaluating the dimensions of the parts to make sure that they are within the defined tolerance is an important aspect of aluminum parts quality control. A CMM (coordinate measuring machine) and optical scanners are often used for dimensional analyses. While these techniques can evaluate the outer surface dimensions, X-ray CT (computed tomography) technique can scan the entire volume, including the internal dimensions and defects.
Analysis procedure
- In this example, a machined aluminum part was scanned using a micro-CT scanner, CT Lab HX.
- The surfaces of the parts were detected using the ISO-50 surface determination technique.
- A GD&T analysis was applied to the cylinder-shaped holes and top and bottom surfaces.
1. CT scan
A roughly 30 mm diameter aluminum machined part was scanned to produce the 3D grayscale CT image.

2. Surface determination
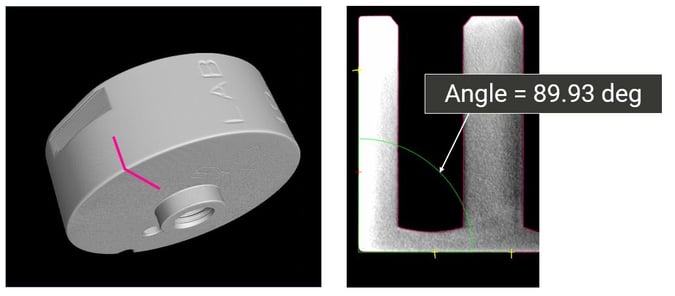
The surfaces of the parts were detected using the ISO-50 surface determination technique. The detected surface is traced with pink lines in the figure on the right. At this point, you can do simple measurements such as distances and angles.
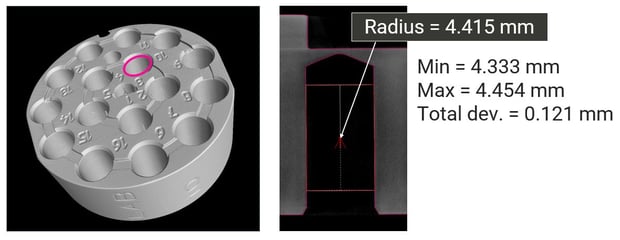
You can also measure the radius of a cylinder and obtain average, minimum, and maximum values to evaluate the variance of the measurement.
3. GD&T analysis
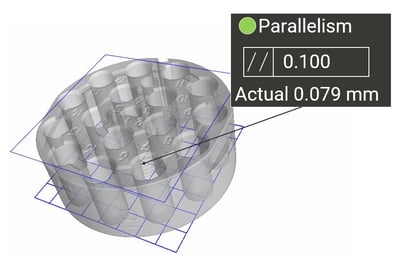
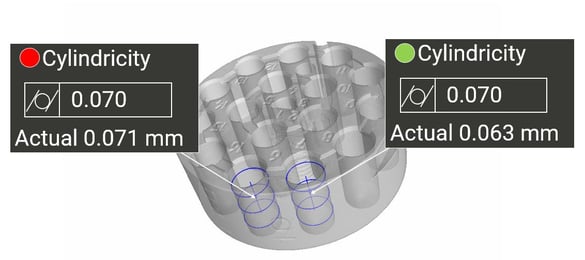
GD&T analysis considers the tolerance of each measured value for the part to function properly. An example of a cylindricity test is shown in the figure.
Using GD&T analysis, relationships of two components can be evaluated. An example of a parallelism test is shown in the figure.
