Application Note RACCT9026
About the sample: Aluminum die casting
Die casting uses high pressure to force molten metal into a molded cavity to create metal parts. It can handle relatively complex shapes and is suitable for mass production. Along with zinc, copper, magnesium, etc., aluminum is one of the metals die casting is often applied to. Although the die casting production process is relatively fast and simple, because of the molten metal injection process, the resulting parts often have air bubbles or voids. Large voids or clusters of voids can weaken the metal parts and need to be avoided. X-ray CT (computed tomography) technique is often used to inspect voids in die casting metal parts owing to its non-destructive imaging capability.
Analysis procedure
- In this example, an aluminum die-casting part was scanned using a micro-CT scanner, CT Lab HX.
- The voids inside of the aluminum part were identified using the CT image.
- The sizes and locations of the voids were analyzed.
1. CT scan
An aluminum die-casting part was scanned to produce the 3D grayscale CT image.
2. Void detection
The voids that appear darker in the X-ray CT image were detected based on their gray levels. The detected voids are highlighted in the figure.

3. Void sizes and locations
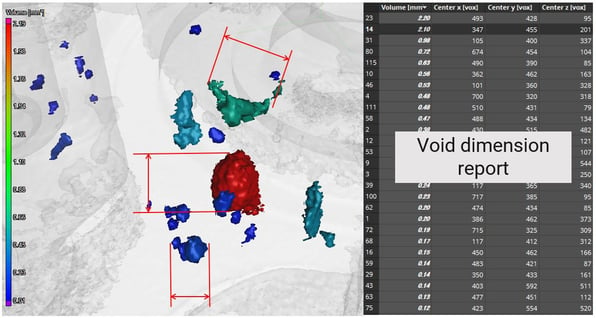
The sizes and locations of individual voids were analyzed. The figure shows an expanded view around a cluster of voids. The voids were color-coded for their volumes with red and blue indicating 2.19 and 0.1 cubic millimeters, respectively. This type of analysis report can be used for a pass or fail test by defining the allowable largest void size, concentration, locations, etc.


